

Onna-Bugeisha

The Inspiration
Ever since I made the leather armour for Suki I wanted to redo that process with a different, more period accurate samurai. The idea and comfort of leather armour really stuck, but apart from that there was no inspiration whatsoever. I did have some colour schemes, with black and grey as basic tones and maybe some details in a different colour, but the brain was smooth and all ideas just bumped off.
Then, when I was out shopping for something entirely different at my local fabric shop, I found a gorgeous grey fabric with a black pattern that looked (if you squinted hard enough) like Japanese kanji and everything came together in my plan. I got my fabric, got my idea and when I got the chance to take pictures at the Japanese Garden I started head over heels on this awesome project!
The Making Of The Costume
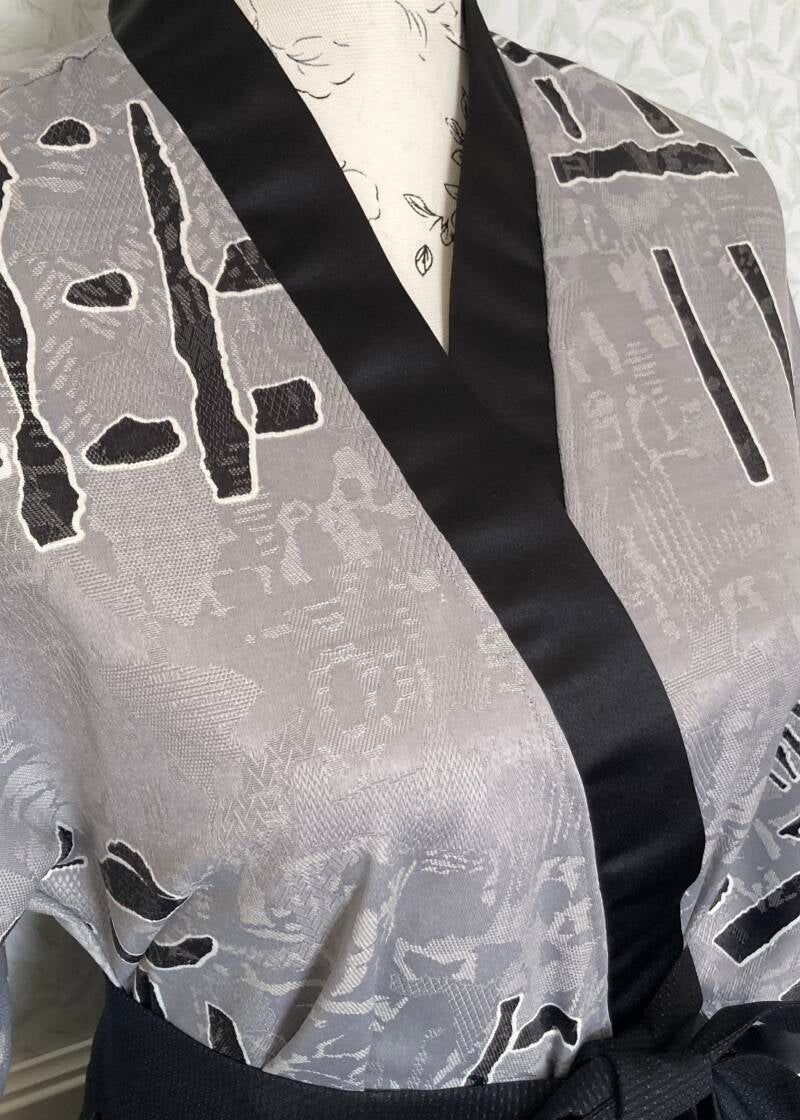
I found my grey kimono fabric by chance, and since it has a black pattern I decided to use some of the the leftover fabric from Mihawk's jacket for details. I got my leather from one of my favourite shops: a shop that repairs leather furniture and sells the leftovers for a low price. I already got my leather there for Suki and my Viking so I wasn't surprised when I managed to find a whole batch of beige sheepskin leather for a super decent price! Now that I had most of my materials, I could get started on making my design.
I found an actual kimono pattern in one of my mum's sewing magazines, and got straight to work. It was a fairly easy pattern and I managed to make it without any errors. I cut some very long strips of Mihawk's shiny black fabric and ironed them flat, creating a huge bias binding. I finished the neck, sleeves and bottom hem with a wide strip of black fabric and the front with black satin bias binding. I finished the kimono with some invisible hooks to keep it closed and my first piece was done! On to the armour.
The thing that was an absolute must for me in terms of armour, was an oni mask or demon mask. I find those super awesome and for me it's a really distinct part of the samurai armour. I was hoping to find a pattern for foam on Etsy, which I would then adapt for leatherwork, but to my amazement I found an actual leatherwork pattern! I was so happy and excited that I bought it, printed it and I actually put it together in one afternoon that same day. It looked absolutely stunning!
However, I wanted my armour to be black, and therefore I had to stain my mask to give it the correct colour. My little brother did some research for me and found out that the stain he made for his wood actually works on leather too. It's a mix of steelwool soaked in distilled vinegar, left to rust for a few days. He had a batch ready, and after some small tests I stained my mask and it became a beautiful deep black! I finished it off with a wax made from beeswax and linseed oil to make it waterproof and deepen the colour.
Next up was a helmet. I wanted a traditional kabuto helmet and after some searching on Etsy I found a pattern for foam that would work with leather too. I did struggle a bit with scaling the pattern, since I have a very small head but the helmet needs to look oversized. After finding the right scale I printed it out and went straight to work. Sewing my helmet by hand took about two full days!
Then, I hit a problem. The kabuto helmets have two flaps in the front that curl backwards, a shape that is easy to achieve by heat-shaping foam but not that obvious to make in leather. I turned to the internet again and found that you can soak and then bake leather on really low temperature and actually shape it that way! This seemed simple enough; I did a test, I found it that it really was that simple, cut my leather for the flaps and they came out perfect! I attached them to my helmet and then the basic shape was done.
I decided to bake my whole helmet to really keep that nice dome shape intact. I struggled half an hour to find a bowl that fit the dome (ended up with one of my mum's vases) and then I had to keep the neck guards outwards with metal wire. Another half-hour struggle later, I put my helmet in the oven and then I had to have patience. I regularly checked the leather to keep the shapes the way I wanted and let it cool off the entire night. In the morning it was perfect!
Then came the moment when I was about to give up on this whole project.
I had an amazing kimono, a perfect black oni mask, and a superb kabuto helmet that still needed staining. I had this image of a beautiful black helmet in mind, so you can imagine my horror when I started staining it and the leather turned BROWN. At first I thought the stain needed some more time to work, so I continued my helmet. I came across spots where the stain didn't even attach to the leather and simply rolled off! About 5 minutes after I started staining I had turned this gorgeous helmet into this messy, brown-stained and blotched horror. It seemed that every attempt I made at saving it only made this worse, I was about to have a mental breakdown and was thinking of just giving up on this project altogether.
In a whim I got some baby wipes and hoped that if I wiped off the brown blotches that maybe they wouldn't settle in the leather and cause permanent damage. Wiping the helmet down did remove most of the blotched and actually took the grease off from the unstained parts, which started to become dark grey. I now had a dark grey helmet with brown stains and I decided to call it a day, make new stain and try a different time.
After some deep breaths I decided to work on my wig. I wanted to give this onna-bugeisha long black hair, and I still had Mihawk's wig laying around unused. I have no crimper but the internet saved me and gave me a way of crimping a wig by cooking the fibers. I combed out the wig (half an hour), teased it, cooked it, let it dry and then brushed it all out (3 hours of brushing and combing) and got a wig with about 5x the volume! Then I straightened it to get this super voluminous wig into a sleek long coupe and the hair was so silky and smooth!
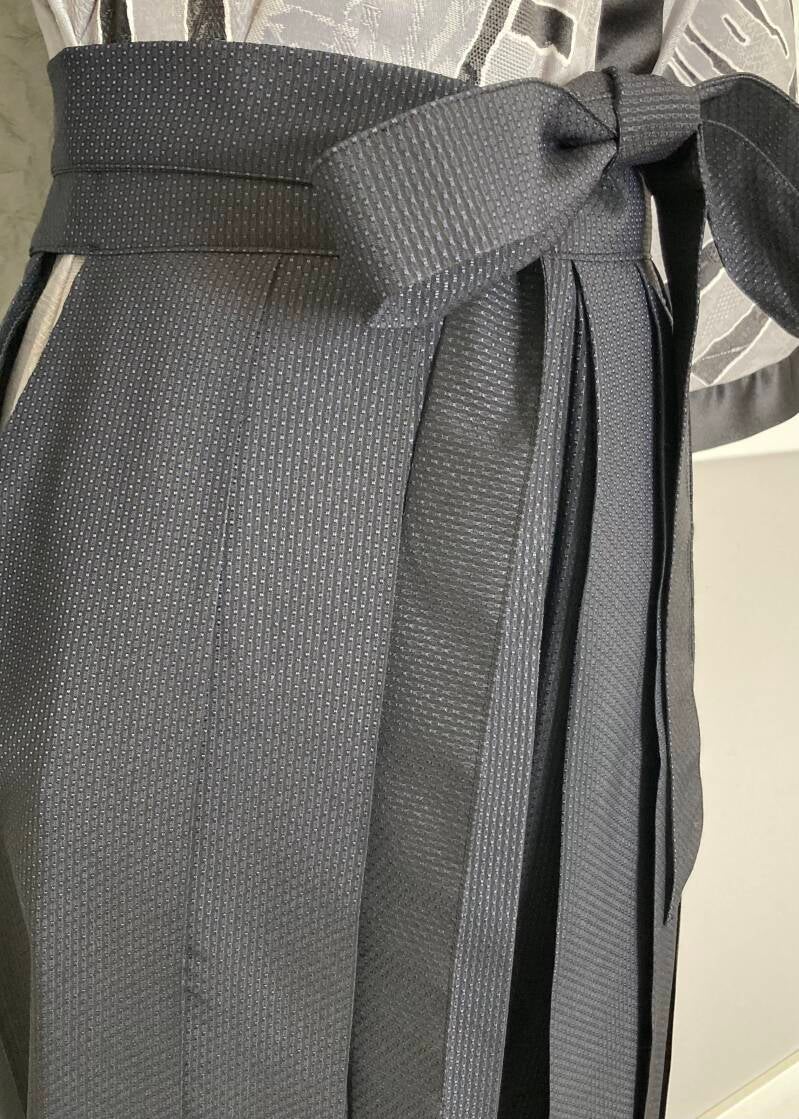
My hakama pants were made from a tutorial that I found on YouTube. I got fantastic fabric at the market and after giving it a quick wash I got down to business. Sewing the hakama was very easy, the tutorial and blog had really good pointers on how to determine the size of your fabric based on your body. After sewing came the pleating. I cannot do math for the life of me so calculating the width of the pleats was nearly impossible. I ended up eyeballing the pleats, measuring the total width and pinned then down when I was satisfied, which took about an hour!
Ironing the pleats was really scary. I'm not a fan of ironing, and I purposefully got a fabric that creases super well when ironed to make sure that the pleats stay in place but that meant no margin of error! Luckily I had some big brain time and went on to simply pin the pleats down and first iron around the pins before removing them and ironing the whole leg. It took a lot of work to constantly move my pins around but in the end I managed and got super crisp pleats!
Now that my clothes were done, it was time to start on the armour. I decided to copy Suki's base armour for the flaps and make them a bit longer and wider to stand out more. All in all the flaps took me about a day and a half to sew together, and then another half a day to punch the holes and add the rope, for which I chose to pick black and dark red as a complimentary colour. The problem was that I didn't want to make a full body armour (yet) and I had no way to attach the flaps. After some thinking I decided that the best way to go was to use an old belt, punch holes in it and hang the flaps from there to make it easy to wear and keep them straight. Somehow this worked super nice and I was so happy with the result!
The obi was fast: wide strip of red fabric, sew, turn inside out, iron and done. I chose a dark red to make the dark red stitching on the armour pop out. For some extra detail I made two butterfly knots, added lucky coins to them and tied them on a long rope so they could be worn as a belt. Lastly I made a black belt from the shiny fabric that lined my kimono and it was done!
In the mean time, behind the scenes, my brother crafted me a pair of traditional Japanese geta slippers from oakwood. They are super cool and actually quite comfortable to wear and really lift this costume up!
I also decided to finish my kabuto helmet anyways by adding tassels and weaving the back with black and red like the armour. I put a lot of work in it so I didn't want it to sit in my unfinished stuff bin for ages, and in the end I'm really happy that I decided to keep the helmet, because even though the colour is not the same as the armour it does give that traditional Japanese warrior vibe!
Working on this costume was the first time that I really hit a hard spot and wanted to give up, but with some help from outside and some proper peptalks I still managed to finish it and I'm so glad I did! It might not be a popular anime character or famous film persona, but the process of making my Onna-Bugeisha really helped me to grow in some ways that wouldn't've happened otherwise!


The Crafting Details
Time it took to finish this cosplay: 2 months (July 2025 - September 2025)
Skills I learned for this cosplay: leatherworking from a pattern, shaping leather, hardening leather, making leatherstain, staining leather, crimping a wig without a crimper, tying sliding knots, tying butterfly knots, pressing pleats
Patterns/references used:
Historically Accurate Hakama by And Sewing Is Half The Battle
Video Tutorial of Hakama by Adonis Cosplay
Leather Oni Mask by GrainydaysPH
Samurai Helmet Template by FingerprintProps
Japanese Geta by Ancaff33
Pricetag of this cosplay: €104,-

Picture by Cosplaycloud

Picture by Cosplaycloud

Picture by Cosplaycloud

Picture by Cosplaycloud

Picture by Cosplaycloud

Picture by Cosplaycloud

Picture by Cosplaycloud


Maak jouw eigen website met JouwWeb