

Mad Hatter - Alice In Wonderland

The Inspiration
What other inspiration besides the Mad Hatter being played by Johnny Depp do you need? Ever since I saw the film in theater in 2010 I thought his portrayal of the Mad Hatter got close in awesomeness to his portrayal of Jack Sparrow. The way he walks, the way he talks, the little twitches of his hands and of course the overall madness and chaos that he radiates!
Besides all that inspiration, the actual push that I got to unlock my full genderbend potential and see him as a possibility for a cosplay, was a pair of boots on Facebook Marketplace. Dark red leather, old Victorian heel, lace trimmings. Somehow they reminded me immediately of Alice in Wonderland, even though I hadn't seen the film in a long time. I added them to my favourites but didn't do anything with it because sadly I saw no use for them in daily life.
Then, when my friend invited me to come to a convention with her and I needed a costume, I rushed to check if the boots were still available and when I saw that was the case I picked them up the next day. They fit like gloves and are really comfortable so my first cosplay was a fact: it would be the Mad Hatter from Alice in Wonderland!
The Making Of The Costume
Because I had no experience with cosplaying or costume making, I had to start from scratch and decided that I would thrift clothes and transform them into a costume. I do have quite a lot of experience with sewing, just never made clothes, and I'm very creative with everything else so I saw this as a nice opportunity and challenge.
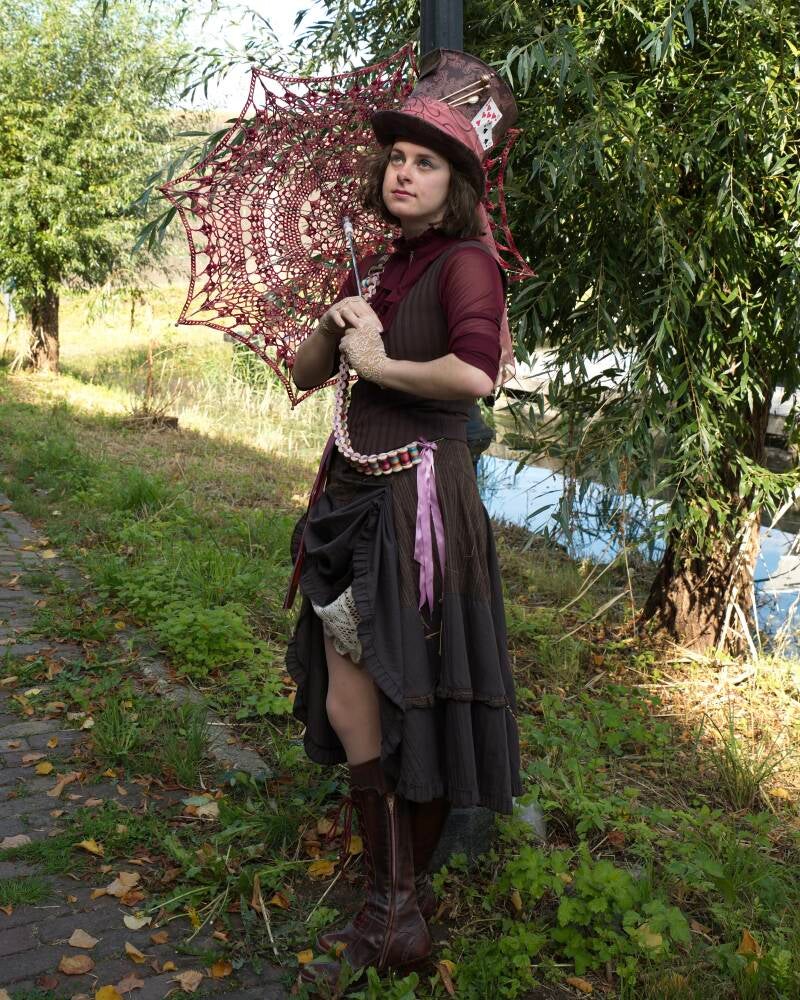
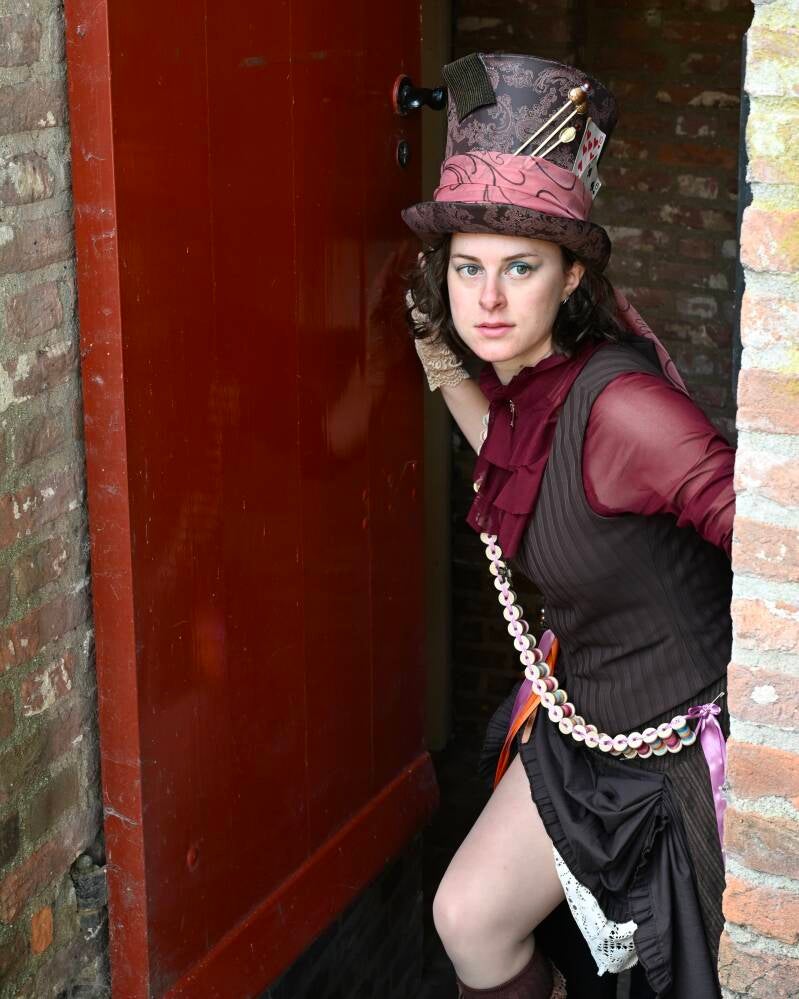
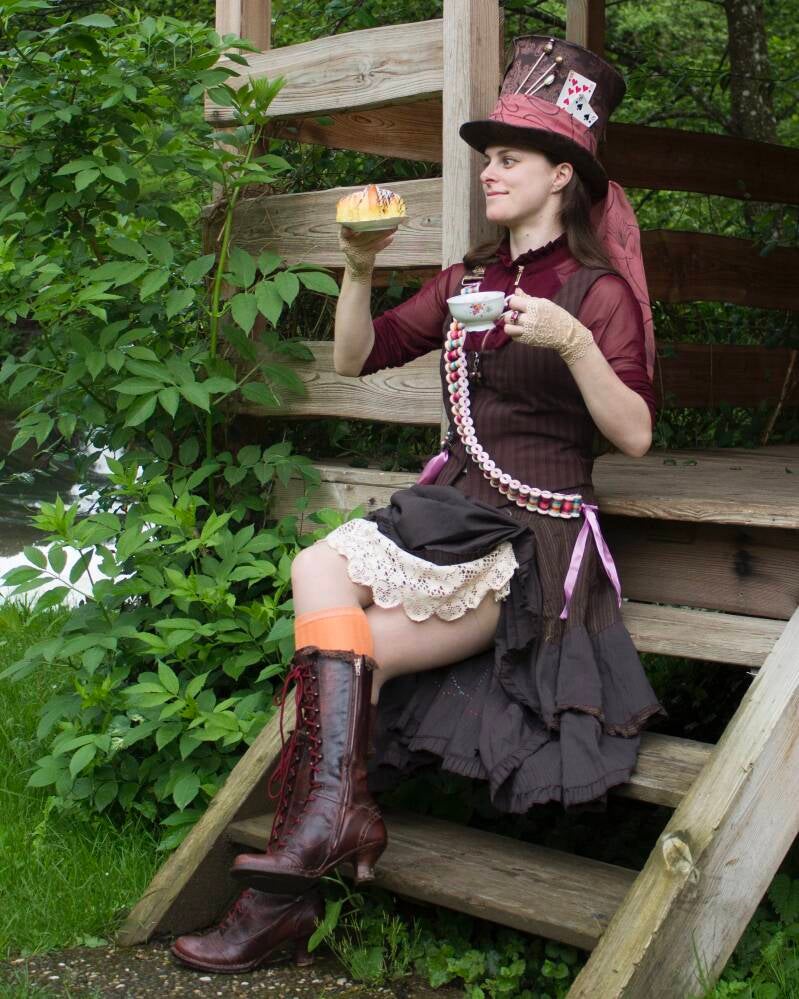
After the boots, which I had given a small makeover with some leather oil and new burgundy laces, I thrifted a small brown corset jacket which was exactly my size and fitted entirely in the style of the Mad Hatter. I took off the ugly plastic tag on the zipper and replaced it with a small metal bow, as a nod to the original Hatter's huge bow-tie.
It took a lot longer to find a fitting skirt. I had the idea to make a skirt that was gathered in the front and dropped in the back so i could show off the boots but everything I found was either too slim to make that work or not the right material (I wanted cotton, since nylon didn't exist in the Victorian era and I'm very picky on such things). After a LOT of visits to my favourite thrift shop the perfect skirt was suddenly and unexpectedly dropped in my lap: brown, cotton, had some weird stitching on it and, most important of all, a ruffled trim and a super wide circle! It was exactly my size so I took it home and my outfit was slowly coming together. I gathered the front and embroidered leaves and vines on the back, as a reference to the leaves on Johnny Depp's pants. After the first time wearing the Hatter I added a lace trim in the front to avoid wardrobe malfunctions, and to be honest I really like that little touch!
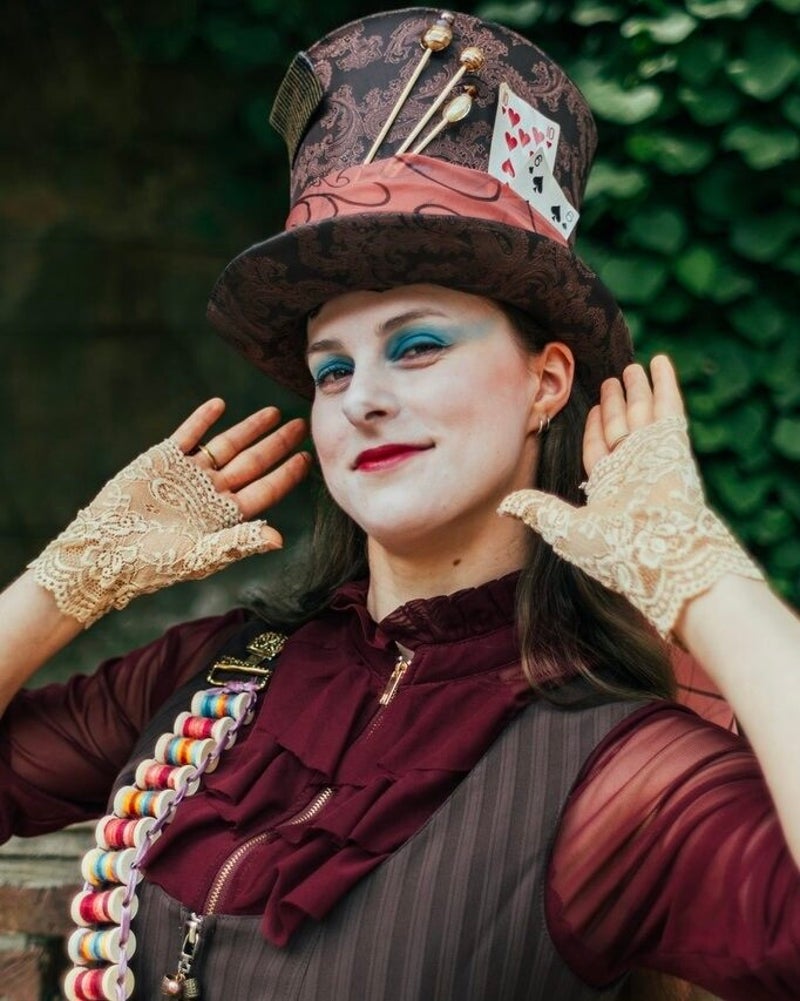
I found an amazing safety pin full of orange and purple pearls and decorations, I added some colourful ribbon to it and it became an amazing accessory. One of the most fun parts of this costume was the sash with bobbins! I found wooden bobbins at Action and two balls of multicolour yarn in pink-purple and blue-orange tones, the perfect match. I glued the yarn to the bobbins and then used a purple ribbon to tie them together in a sash. Another thrifted brooch became the top and my sash was done!
The purple top came as a surprise. I was on a visit in The Netherlands and decided to go to the local thrift shop (which is quite expensive, not very nice and usually offers broken items) and the purple top was right there! See-through mesh, ruffles, high collar and a zipper in the front for easy dressing, it was perfect. Even though the sleeves are not very hot I liked them better rolled up so that was the look I went for. It is the only part of the costume that I left completely unaltered.
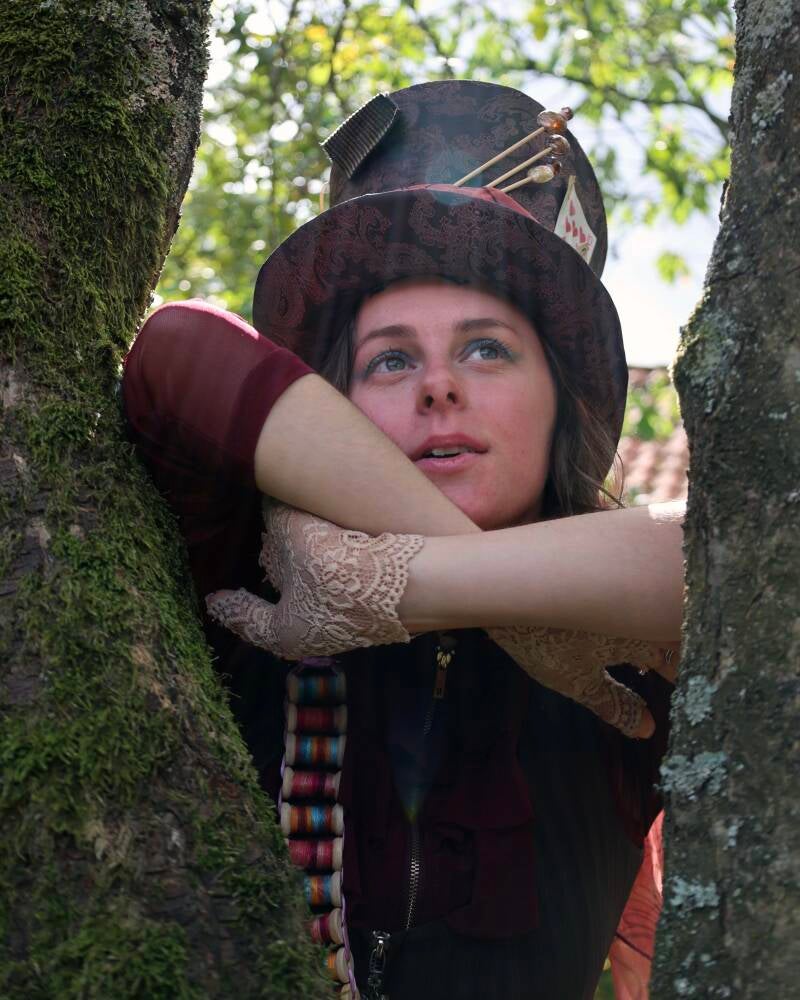
I did order four things on the internet for this cosplay: the burgundy laces, the base hat and lace gloves. I dyed the gloves with tea to give them a nice shade of beige and together with some rings I had all my small details done. This only left the hat, which was a whole new level of project. I had seen an example of the Mad Hatter hat with brown paisley fabric and I loved the feminine touch of that. However, after checking 4 shops, no brown paisley fabric seemed to exist and I almost lost courage. Then came the internet again and I ordered a fabric from there. I debated between a dark burgundy or brown, chose brown and was very happy when it arrived and was the prefect colour!
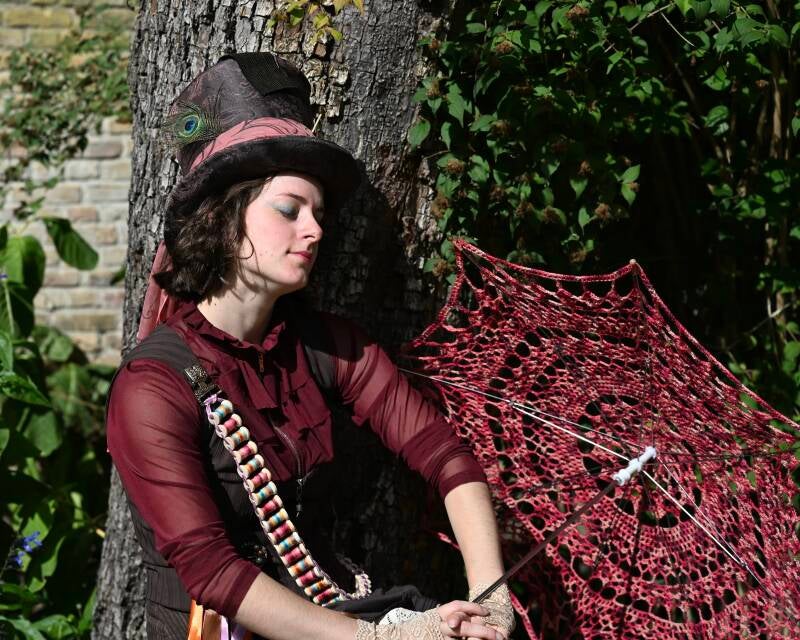
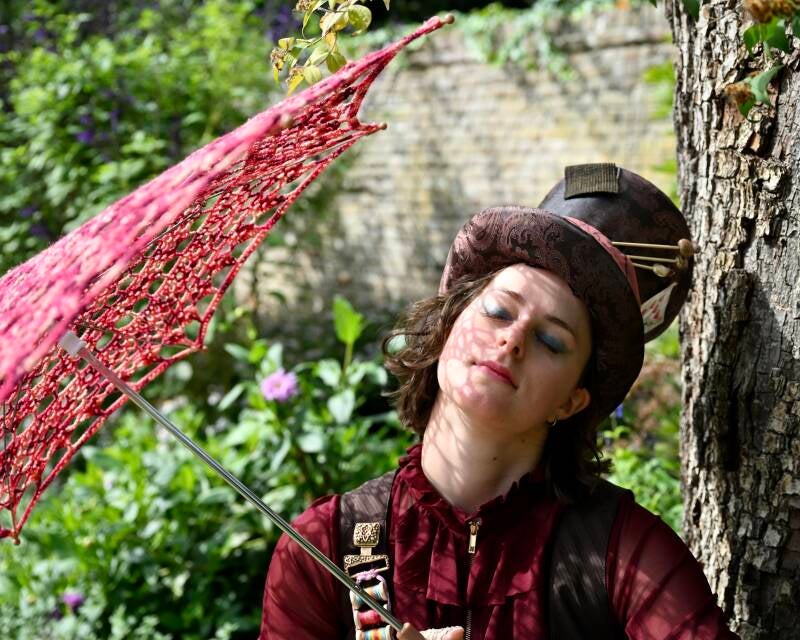
I started my hat by stripping down the band over it, pulling the fabric taut to accentuate that conical shape and re-attaching the original fabric. Covering the hat in brown paisley was quite a thing and took me two days. I wanted no crinkles and the fabric definitely wanted crinkles. Eventually I managed by cutting of the top, pulling the fabric over the edge and glue it down. Since I almost destroyed the basic shape of the hat, I had to add a support to the top and a circle cut from an old pizza box did the job just well. I covered it in fabric and hand-sewed it to the base. For the brim, I simply placed the hat on a piece of fabric, pulled it up over the brim and glued it down. Since the hat was too big for my head anyways, it gave me a great opportunity to change the size. I cut a cross in the bottom, folded the parts inside and just like that I reduced the size. I added a foam doughnut on the inside to prevent the hat from falling over my eyes and give extra comfort while wearing and the base was done!
The decorations of the hat were by far the most fun part of the whole costume, since the hat is the whole character of the Mad Hatter. I found a nice scarf to tie around the base, damaged up some playing cards and dug a peacock feather out of my craft stock. A small piece of fabric from the thrift shop was another great addition. I searched for real hat pins, but encountered two problems: they were too small to be noticed well and very expensive. I made some myself with bamboo sticks and glass beads that I took from a (thrifted) necklace and voilà, hat pins!
The last detail were the socks. I bought a pair of brown and a pair of orange socks, cut off the foot of one of each and pulled the leftover far up on my leg to give the illusion of long socks without getting hot feet.
I really had a blast making this cosplay, and I love the recycled aspect of it. So much fashion gets thrown away every year and it's such a pity! Thrifting was a great way to make this cosplay and not spend a fortune on fabrics and materials. I think I spend €50,- total on everything and I'm so proud of my Mad Hatter!
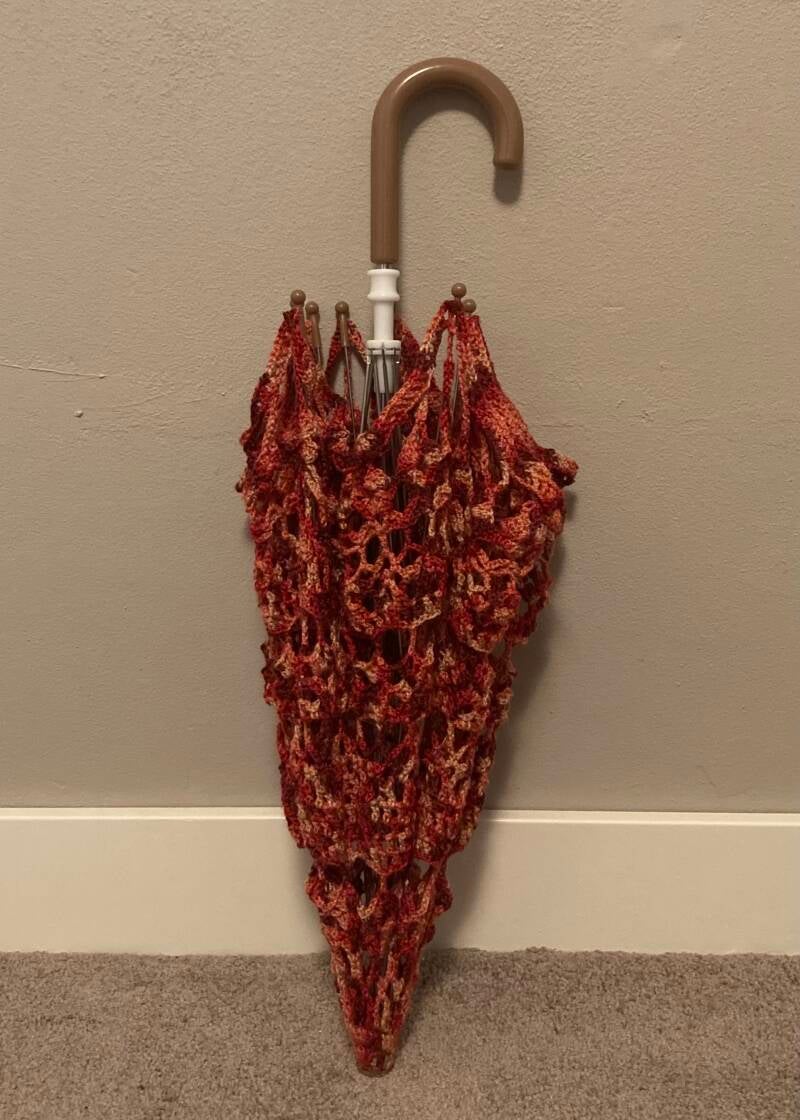
For an amazing photoshoot opportunity where rain was expected, I decided to crochet an umbrella to keep the whimsical nature of the Hatter alive while staying dry. I found a pattern online, took the same yarn as on the small bobbins and got to work. After two days of almost non-stop crocheting, I soon figured that covering the transparent umbrella that I bought for this prop would be nearly impossible (read: I got bored with the repetition of the stitches and still had a ton to make). I went to buy a children's size umbrella instead, took off the fabric and it was an almost perfect fit! I added the last two rows of my own design to make sure the umbrella wouldn't be too tight and deform and then it was done!
It ended up having no cover and is therefore not waterproof, however at the photoshoot we had full on sunshine so it served it's purpose well even without a plastic cover!


The Crafting Details
Time it took to finish this cosplay: 4 months (June 2023 - October 2023)
Time it took to finish the prop: 1 week (September 2025)
Skills I learned for this cosplay: covering a hat in fabric, ageing paper, dying fabric with tea
Skills I learned for this prop: crocheting an umbrella from a pattern
Pricetag of this cosplay: €58,50
The Photoshoots
With special thanks to: Huib van Alfen // Maarten Kleywegt // Dennis Morsch // Bjorn Witteman // Peter Postelmans // Christel Doevendans // Bepke Hovers

Picture by Bepke Hovers

Picture by Bepke Hovers
Picture by Bepke Hovers

Picture by Bepke Hovers

Picture by Bepke Hovers

Picture by Bepke Hovers

Picture by Bepke Hovers

Picture by Bepke Hovers

Picture by Bepke Hovers

Picture by Peter Postelmans

Picture by Peter Postelmans

Picture by Peter Postelmans
Picture by Peter Postelmans

Picture by Peter Postelmans

Picture by Peter Postelmans

Picture by Christel Doevendans

Picture by Christel Doevendans

Picture by Christel Doevendans
Picture by Christel Doevendans

Picture by Christel Doevendans

Picture by Christel Doevendans
Picture by Christel Doevendans
Picture by Christel Doevendans

Picture by Christel Doevendans

Picture by Christel Doevendans

Picture by Christel Doevendans

Picture by Christel Doevendans

Picture by Dennis Morsch
Picture by Bjorn Witteman

Picture by Bjorn Witteman

Picture by Maarten Kleywegt

Picture by Huib van Alfen

Picture by Huib van Alfen

Picture by Maarten Kleywegt

Picture by Huib van Alfen


The Cosplaycloud Photobooth


Maak jouw eigen website met JouwWeb